Area of Operations
The Area of Operation (short AO) is a randomly selected area on the map (Altis or Malden), where the combat is concentrated at. The Safe zones and spawn locations of each involved faction is usually arranged around this AO with the same distance to it for each safe zone.
Core functionality and earnings[edit | edit source]
The goal of each faction is to gather control of the AO by having the most players within the AOs boundaries. Every certain amount of time (usually 30 seconds), the team with the most players inside the AO get's one point up to 100. The first faction that gets 100 points wins the round. If there's a tie between two factions, which would hold the most players in the AO, none of them gets a point.
Each player inside the AO can earn two different types of rewards while being in the AO when a team gathers a point:
- Objective offensive: Rewarded with 50 XP and 50 $. Earned when the faction of the player does not hold the majority of players in the AO.
- Objective under control: Rewarded with 50 XP and 50 $. Earned when the faction of the player holds the majority of players in the AO.
- No earning: Given no team holds the majority of players in the AO, no player within the AO is rewarded.
The faction that currently holds the majority in the AO is indicated in two ways:
- The AO is colored in the factions color (white if no player is in the AO)
- The bottom right faction indicator turns red or green (red: enemy faction holds the majority; green: own faction holds the majority)
- Both indicators turn purple given there's a tie between two or more factions
Locations[edit | edit source]
The AO in Kind of the Hill is randomly selected from a pre-defined set of possible locations throughout the configured map. Currently there're locations available on Altis and Malden.
Spawn locations[edit | edit source]
Before v14, the spawn locations of each of the possible AO locations where fixed for each faction. However, since the v14 update, each factions spawn location around the AO is randomly selected. This mechanism balances out the possible advantages and disadvantages of each spawn location, as no player can know beforehand where where the spawn location will be, anymore.
Altis[edit | edit source]
Agios Dionysios[edit | edit source]
The AO in Agios Dionysios is a rectangle-formed area covering the whole city. It holds 4 towers:
- Tower 1 (one tower height) near the west entrance of the AO next to the main street (right side when approaching from the west entrance)
- Tower 2 (one tower height) at the south entrance right at the middle of the X axis of the AO
- Tower 3 (one tower height) at the east entrance of the AO, next to the street, which is going to the north-east spawn location
- Tower 4 (two tower height) north of the city center
Athira[edit | edit source]
Athira is a circle-formed AO covering the city of Athira and most of the factory area located north-west of it. It is the only AO that holds 5 towers:
- Tower 1 (one tower height) directly at the main street from the west side of the AO
- Tower 2 (one tower height) is located north-west of the south entrance main street
- Tower 3 (one tower height) at the south-west side of the factory area towards the city center
- Tower 4 (one tower height) at the north-east side of the AO surrounded by flat land
- Tower 5 (two tower height) in the city center
Chalkeia[edit | edit source]
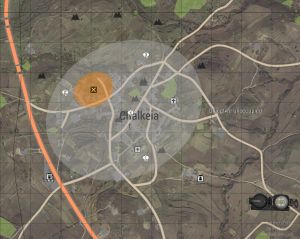
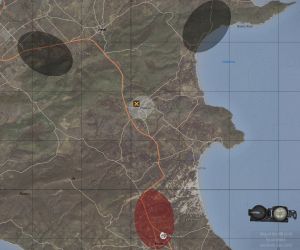
An ellipse-formed AO in the north-east part of Altis. The AO covers the whole city of Chalkeia and parts of the surrounding hills. The surrounding mountains and hills makes this location a good sharpshooter and sniper spot. The AO itself holds 4 towers:
- Tower 1 (one tower height) at the south entrance of the AO behind the graveyard
- Tower 2 (one tower height) located at the north-west side of the AO
- Tower 3 (one tower height) at the north-east side of the AO
- Tower 4 (two tower height) at the city center
The AO also holds two bunker buildings, a small bunker about 50-100 meters west/south-west of tower 3 and a big bunker south/south-east between tower 2 and 1.
Charkia[edit | edit source]
Kavala[edit | edit source]
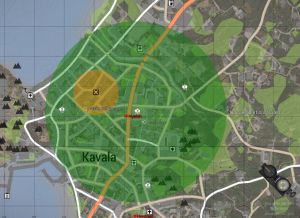
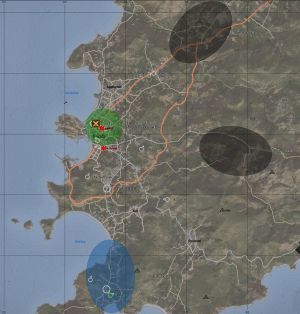
Kavala is one of the biggest cities on Altis. The circled AO covers most parts of the city and it ideal for close-quarter-combat because of the many city-like buildings and small streets. The AO also covers the hospital of Kavala, a non-destroyable building. In the west of Kavala are ruins of an old castle, where an outside, unmarked tower is built as well. The castle as well as the tower are not located within the AO. Within the AO there're also 4 towers:
- Tower 1 (one tower height) at the east/north-east side of the AO next to one possible entrance street of the north/north-east spawn location
- Tower 2 (one tower height) next to an office building at the north of the AO, a possible entrance street of the north spawn location
- Tower 3 (one tower height) at the east side of the AO
- Tower 4 (two tower height) in the city center, right on the old market square
The city also has also 4 office buildings within the AO, where players can go to the top of the roof:
- One right next to tower 2 (north of it)
- One east side of tower 4 (in front of a basketball field
- One between tower 2 and tower three, going to the north-west end of the AO
- One at the main street entrance of the north/north-east spawn location
Additionally, there's an old construction site right outside the AO at the north/north-east where a construction crane is located which can also be climbed by players.
Neochori[edit | edit source]
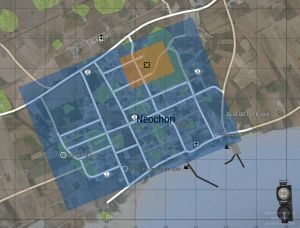
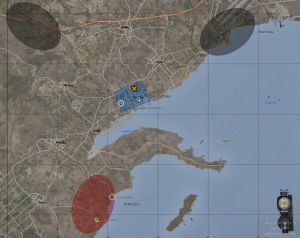
Neochori is another rectangle-formed AO, which covers the whole city of Neochori including parts of the small harbor. It holds 4 towers in the AO:
- Tower 1 (one tower height) at the south-west of the AO
- Tower 2 (one tower height) at the north-west of the AO
- Tower 3 (one tower height) at the east of the AO, next to a big wood-part of the AO
- Tower 4 (two tower height) in the city center
The AO also covers 4 bigger storage halls, where vehicles could be parked:
- at the north-west end of the AO
- at the street from tower 2 going towards the center of the AO on the right side before the first crossing
- entering the AO from the lower east side directly at the beginning of the AO (opposite of the harbor)
- next to tower 3 (north of it)
Paros[edit | edit source]
Pyrgos[edit | edit source]
Sofia[edit | edit source]
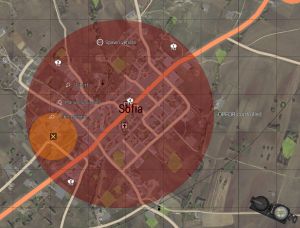
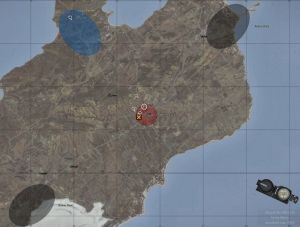
Sofia is a cirle-formed AO covering most part of the city of Sofia. At the north/north-west of the AO is a radar station on a hill. On the north east, between the AO and the north-east spawn location are two communication towers, which can be climbed by players. The AO itself holds 4 towers:
- Tower 1 (one tower height) at the north-east entrance of the AO next to the main street (right side when going towards the AO)
- Tower 2 (one tower height) at the south-west entrance of the AO, next to the main street (right side when going towards the AO)
- Tower 3 (one tower height) at the north-west of the AO
- Tower 4 (two tower height) in the city center next to the main street, right at a gas station
Zaros[edit | edit source]
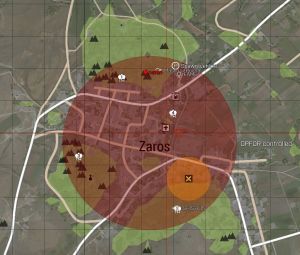
The AO in Zaros also has the form of a circle and holds most parts of the city (apart from some outlying buildings and settlements). The city center is surrounded by three bigger hills and mountains, which are also partly covered within the AO, which makes this location a good sharpshooter/sniper spot as well. It also holds 4 towers:
- Tower 1 (one tower height) at the north hill-side
- Tower 2 (one tower height) at the south hill
- Tower 3 (one tower height) at the north side of the west/south-west hill
- Tower 4 (three tower height) north/north-east of the city center